Manually reinstall Beaver Builder
Ordinarily, you can install and update the Beaver Builder Plugin through the WordPress admin panel. Use these instructions if you need to manually reinstall your Beaver Builder Plugin for any reason.
Reinstall by uploading zip files
WordPress 5.5 includes support for manually updating plugins and themes to a new version by uploading a zip file from within the WordPress admin dashboard.
- Go to Plugins > Installed Plugins (for plugins) or Appearance > Themes (for themes).
- Click the Add New button.
- Click the Upload Plugin button.
- Click Choose File and locate the bb-plugin or bb-theme zip file.
- Click Install Now.
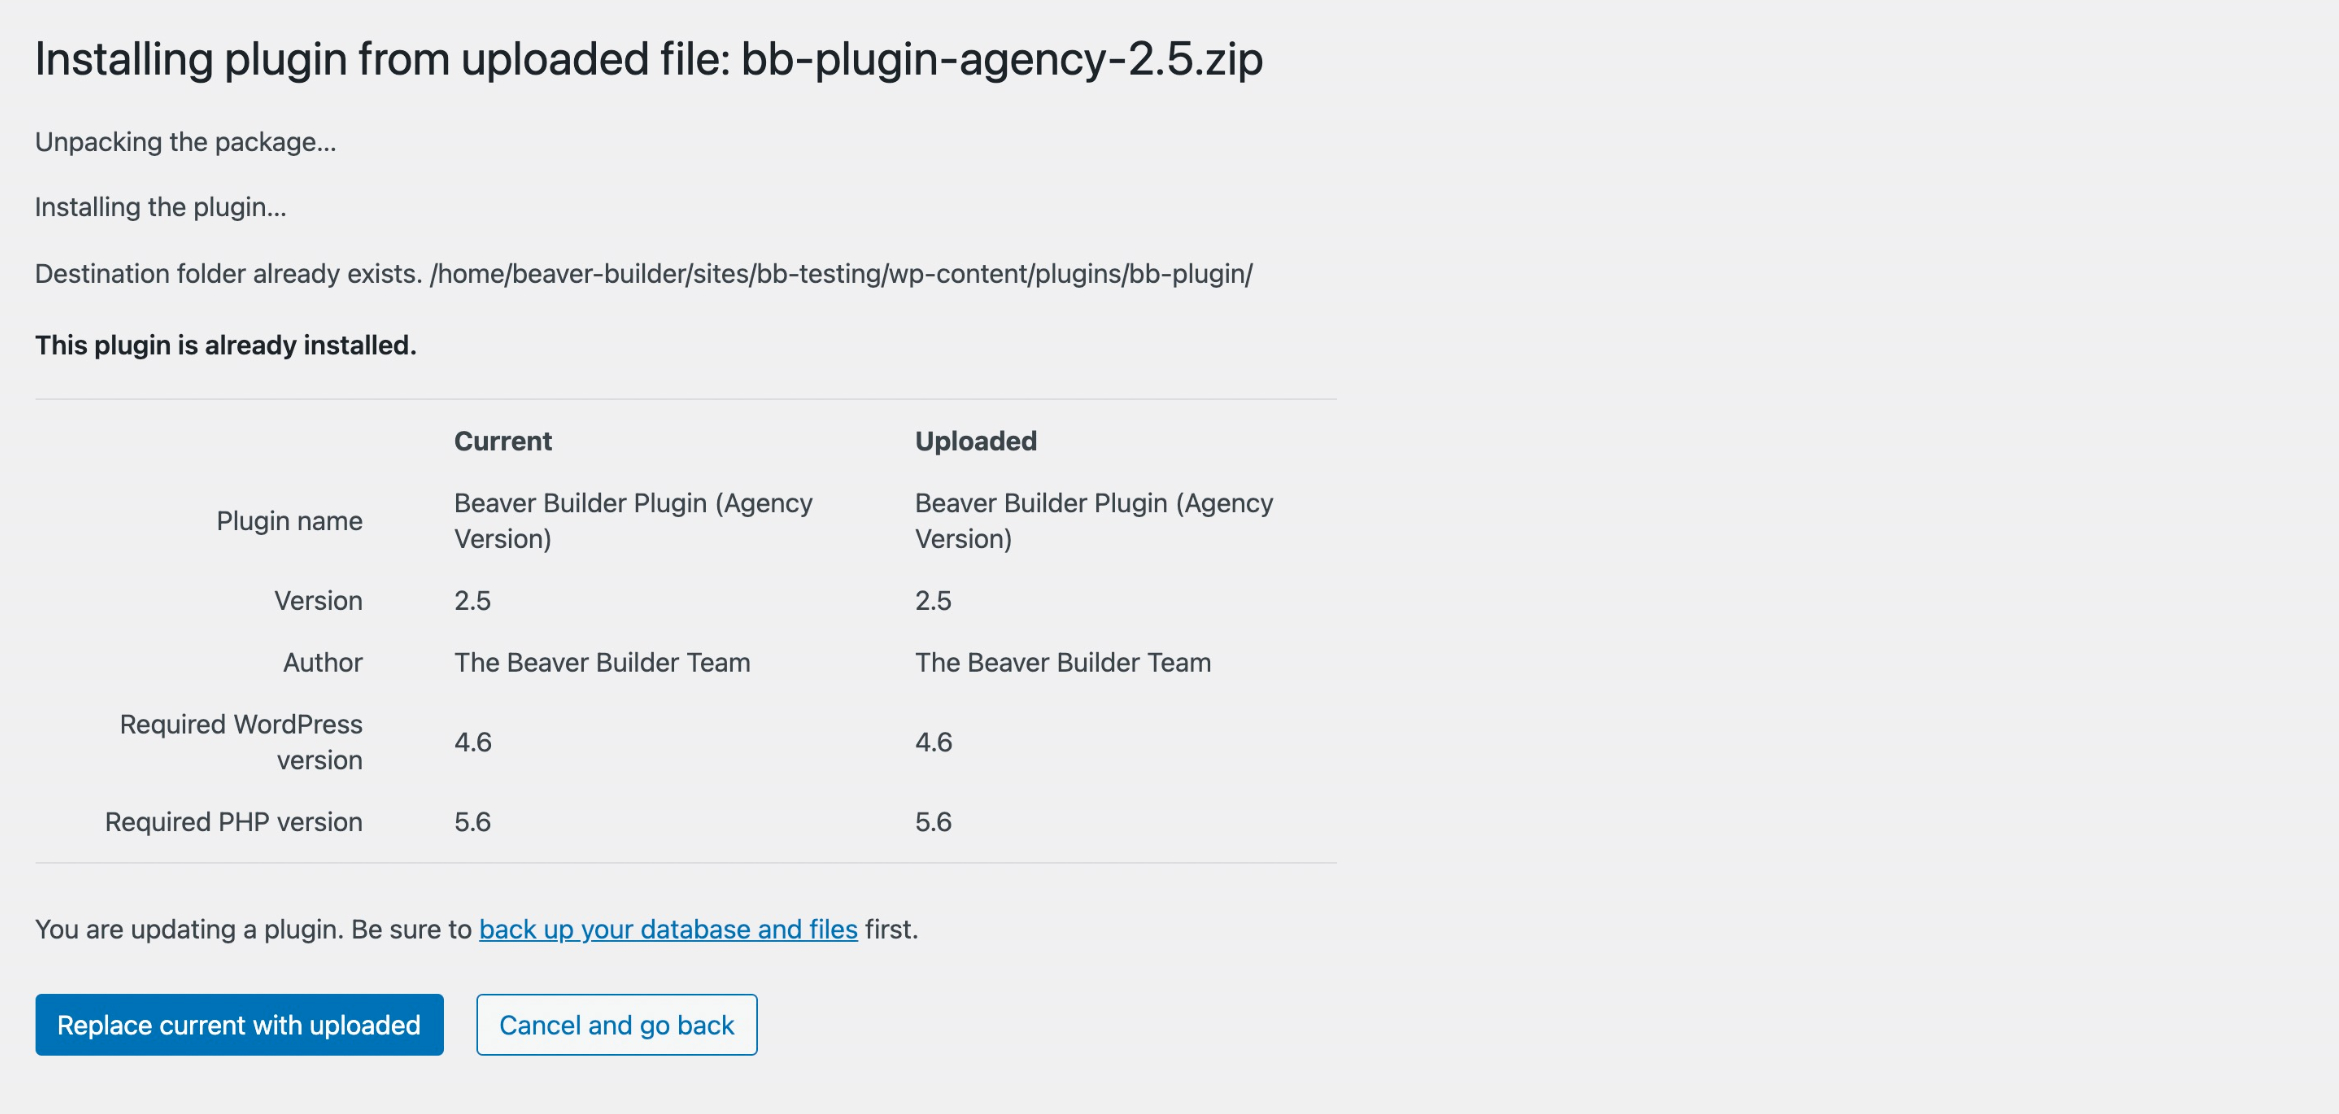
- After the files have been uploaded, the screen will show information comparing the current and uploaded versions of the plugin or theme you're installing and asking whether you want to proceed.
- Click Replace current with uploaded which will replace the current plugin or theme with the one uploaded.

Reinstall using FTP/SFTP
The following procedure requires that you are able to FTP to your website and know the basics of deleting and uploading files with FTP. The procedure is not difficult, but you will put your website at risk if you're not sure about the instructions.
Back up your website completely before making any modifications or changes.
Log into Beaver Builder’s My Account page and download the Beaver Builder Plugin to your desktop. Find the zip file you downloaded and extract the bb-plugin folder.
Delete the existing Beaver Builder Plugin in one of the following ways.
Don't worry, this won't delete your existing layouts.
- On the WordPress admin menu, click Plugins and deactivate, then delete Beaver Builder plugin.
- Using FTP, navigate to the wp-content/plugins directory in your site installation and delete the bb-plugin folder.
Using FTP, upload the bb-plugin folder from your local system to the wp-content/plugins folder in your site installation.
From the WordPress admin panel, click Plugins , find Beaver Builder Plugin in the list and click Activate.