Example: Create a header layout
This is a quick tutorial to show you the basics how to create a Themer layout and choose where to display it on your site.
In this tutorial, you'll create a header that will replace the header on all pages of your site, but not posts or custom post types. Then we'll set an exclusion rule so the header occurs on every page except for a landing page.
It's assumed you've already installed Beaver Themer into the appropriate environment. Or you can create the layout on the Themer Demo on the Beaver Builder website. If you don't feel like going through the effort yourself, we've tried to include enough screenshots to give you an idea of how it works.
1. Set up what you're going to connect to
One of the great aspects of Beaver Themer is that you can create field connections so the content on the published page changes according to your site information or the location at which the Themer layout occurs. In this tutorial, we're going to use field connections for the following content:
- The site's tagline
- The header logo
We're also going to need a menu ready to use. Here's an example of what we're gong for.
You need to have those things ready to go first, so do the following if you haven't already.
- Have an image ready to use as a logo.
- Create a site tagline in Settings > General > Tagline.
In this tutorial, we're using the tagline "We keep it simple". - Create a menu at Appearance > Menu or Customize > Menu.
2. Create a new themer layout
- In the WordPress admin panel, click Beaver Builder.
The Themer layouts screen opens by default if you have Beaver Themer installed. - Click the Add new button at the top of the Themer layouts page.
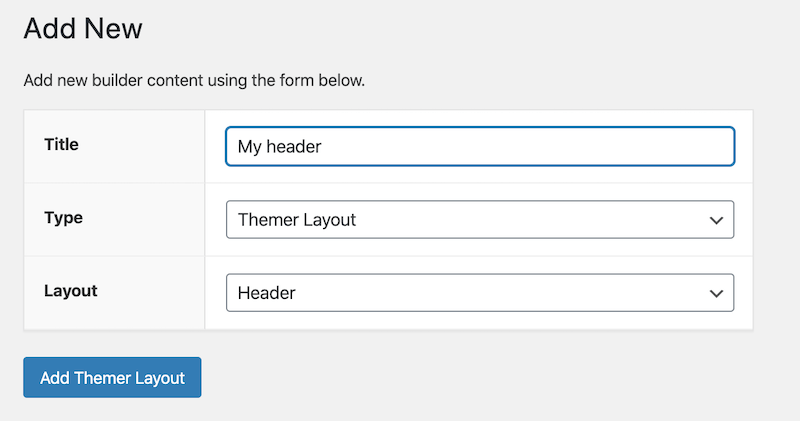
See the screenshot below to enter the settings, or follow these steps. - Enter a title.
We'll use My header as the layout title in this tutorial. - In the Type field, select Themer layout.
- In the Layout field, select Header.
- Click Add themer layout.
The Edit Themer layout screen will open automatically.
Here's the screen with these choices:
3. Edit the Themer layout
Configure the layout settings on the Edit Themer layout screen as in the screenshot below, or use the following procedure for details.
- Verify that Type is Header.
- Leave Sticky and Overlay set to No.
Set to No, the header will scroll out of sight as the page moves up, and the header won't overlay the page content. - For Location, choose Page in the left field and All Pages in the right field.
This makes the header apply to all Pages (as opposed to Posts, archives, etc.).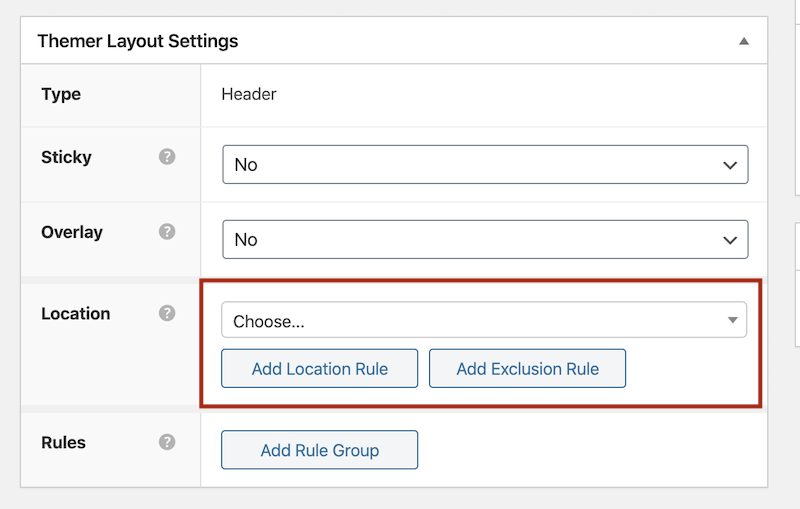
- Click Publish.
You can set up additional location rules or create exclusion rules. For example, you could choose all pages except your landing page.
The Rules section also lets you set up advanced conditional logic rules, based on a number of different conditions. See the article about conditional logic.
![]()
4. Create the Themer layout
The Beaver Builder editor is used to build Themer layouts. When the new Header layout opens for editing in Beaver Builder, it displays the default template for this type of layout, as shown in the following screenshot.
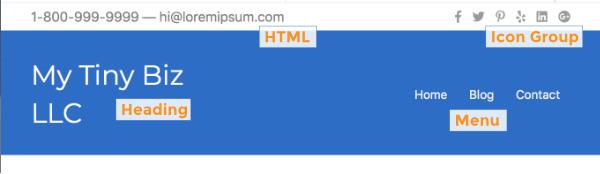
There are two rows, one for the top bar and one for the main header area. The top bar has two columns. The left column contains an HTML module and the right contains an Icon Group module. The second row also has two columns. The left column contains a Heading module, and the right column contains a Menu module.
How does the Heading module display the name of the company? If you open the Heading module, as you can see in the screenshot below, there's a field connection to the Site Title, which means the information is being pulled from Settings > General > Site title, accessed from the WordPress admin panel. The plus sign to the right of the field indicates that it's possible to set a field connection for this field.
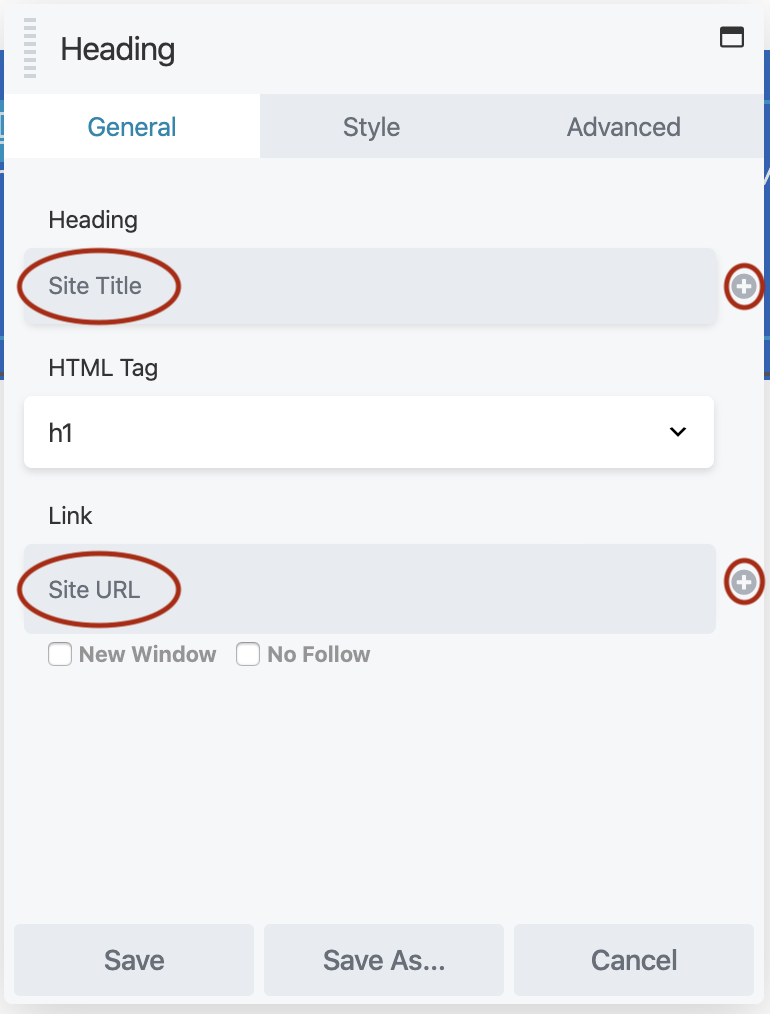
You can also see there's a field connection set to Site URL for the Link setting. This field connection pulls the content from Settings > General > Site address (URL), accessed from the WordPress admin panel.
With Beaver Themer installed, you can use this Site Title field connection throughout your site, even in regular Beaver Builder layouts. If you ever change the information at Settings > General > Site title, your site will instantly reflect the new information wherever it's displayed. Likewise, if you update your site URL and migrate your site to another location, once you change the WordPress setting your site's links are updated.
For this tutorial, we're going to modify the template layout as follows:
- Remove the top bar
- Replace the site title with the site tagline
- Add the business logo above that.
From the editing screen for the Header layout that you edited in the previous procedure, click Launch Beaver Builder.
Mouse over the top-bar row and click the X tool to remove the entire row.
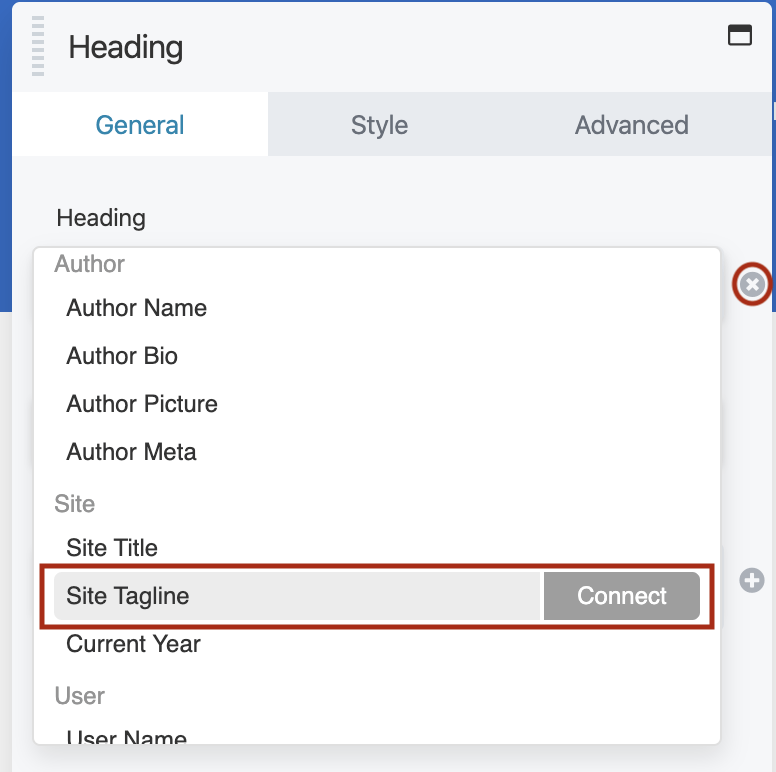
Open the Heading module for editing, make the following changes, and save the module.
- Click the plus sign to the right of the Heading field.
- Scroll to the bottom of the list and choose Site tagline.
- Click the Style tab and in the Typography section, click Font and change Size to 20 px.
Click the Menu module to open it for editing and on the General tab in the Menu field, select the menu you want to use.
You must have already created a menu for it to appear in the Menu field.Add and edit a Photo module as follows:
Open the Content panel by clicking the Plus sign in the upper right corner of the screen
Drag a Photo module into the layout above the Heading module in the left column.
In the Photo field, click Select photo and add a photo to serve as the logo.
Publish or save the page.
When you're editing a Themer layout in Beaver Builder, you can preview specific pages and posts in your site by selecting them in the Preview list at the top of the editing screen.

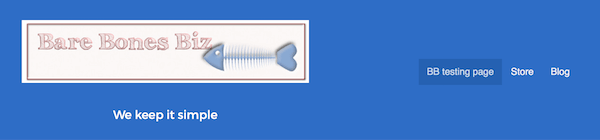
Here's a screenshot of what we ended up with:
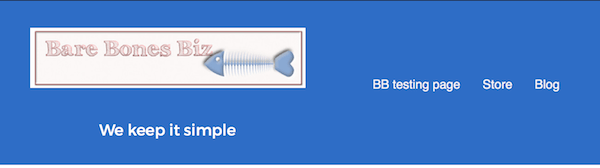
This isn't beautiful yet, but feel free to tinker with any other parts of the layout, just as you would with a regular Beaver Builder layout. Try it out for responsiveness to see how it behaves.
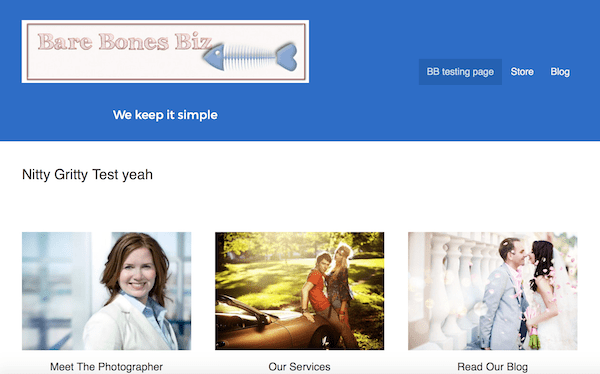
5. View the header layout on a page
Now it's time to view your handiwork on your site. Because we set this header to apply to the entire site, you can view any page on your site to see if the header has replaced the standard theme header, as in this screenshot:
6. Extra credit
You added a field connection to the site tagline in the header layout. When the field is text-based, you can use a shortcode instead to mix and match field connections or add your own text. For example, instead of just the site tagline in that Header module, you could add the site name and the site tagline in the Heading field.
To see how to add field connections as shortcode, see the field connections article.
Done!
Now you've got the essence of how easy it is to build a Themer layout!