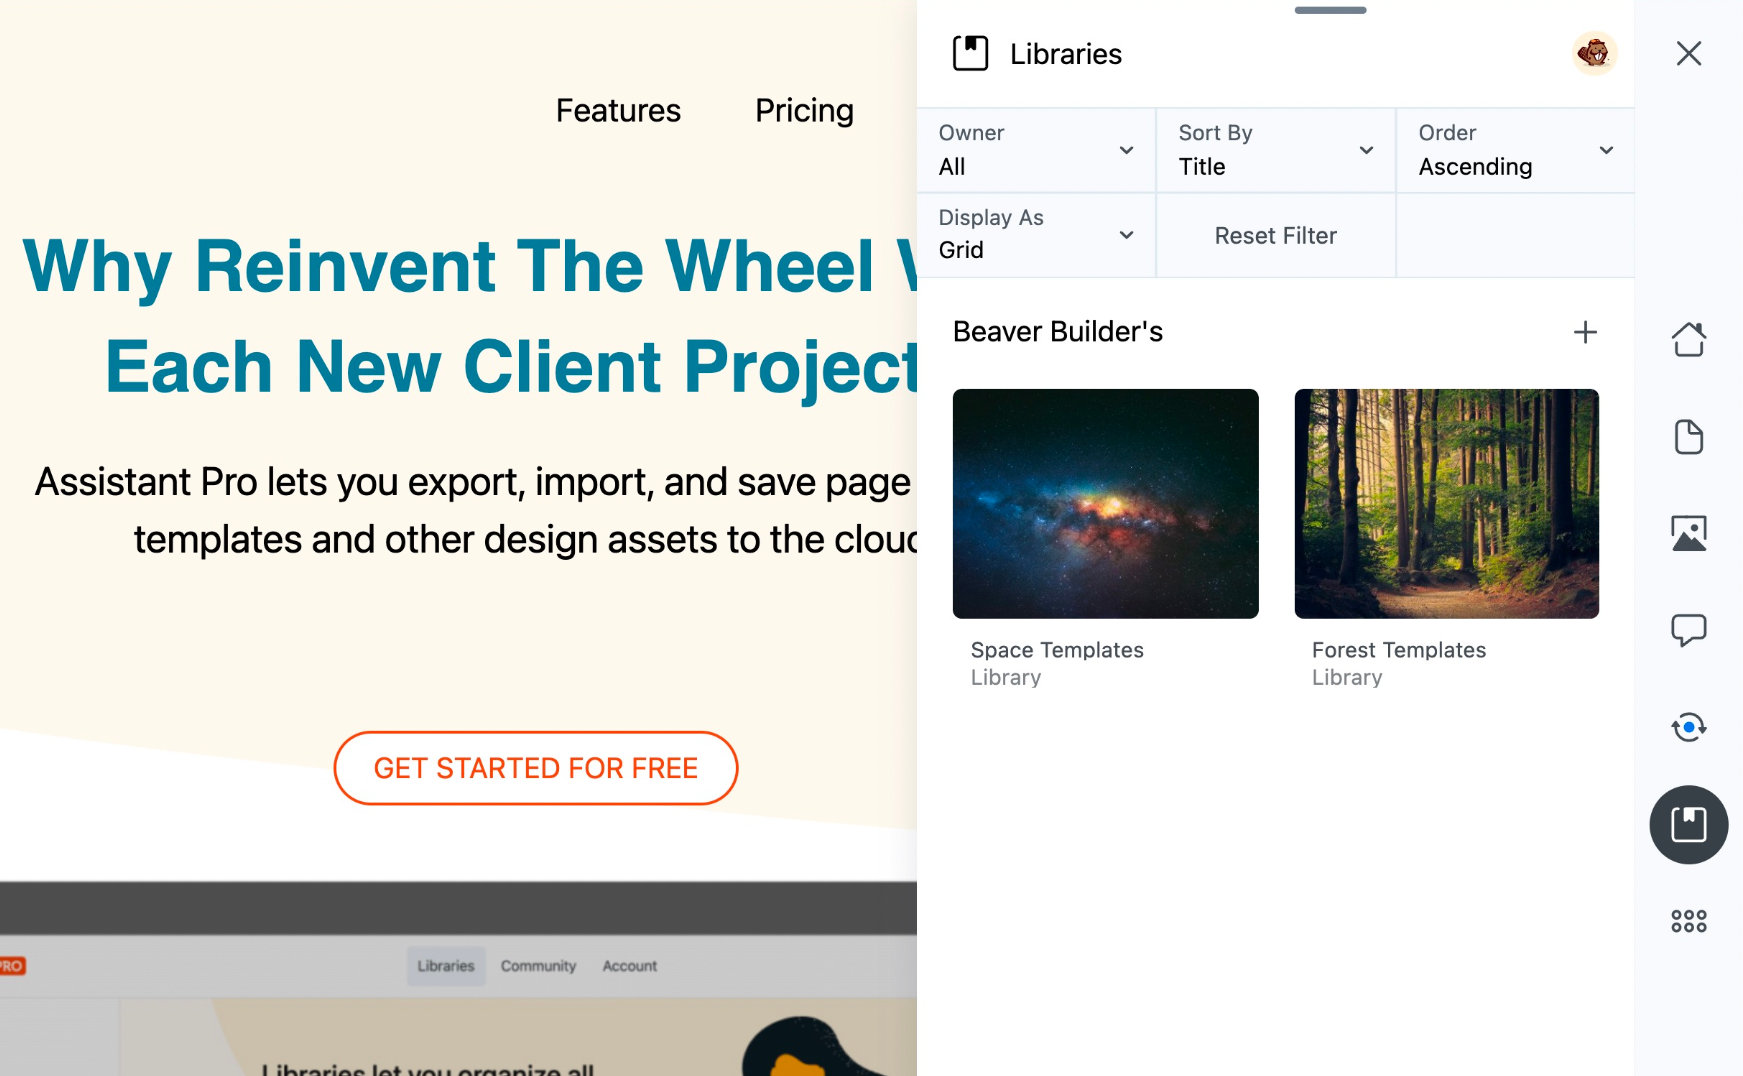
Libraries App
The Libraries App allows you to connect your WordPress site to Assistant Pro Cloud. Once it's connected, you can create, manage and add content to libraries, launch the Assistant Pro Cloud and disconnect from Assistant Pro Cloud.
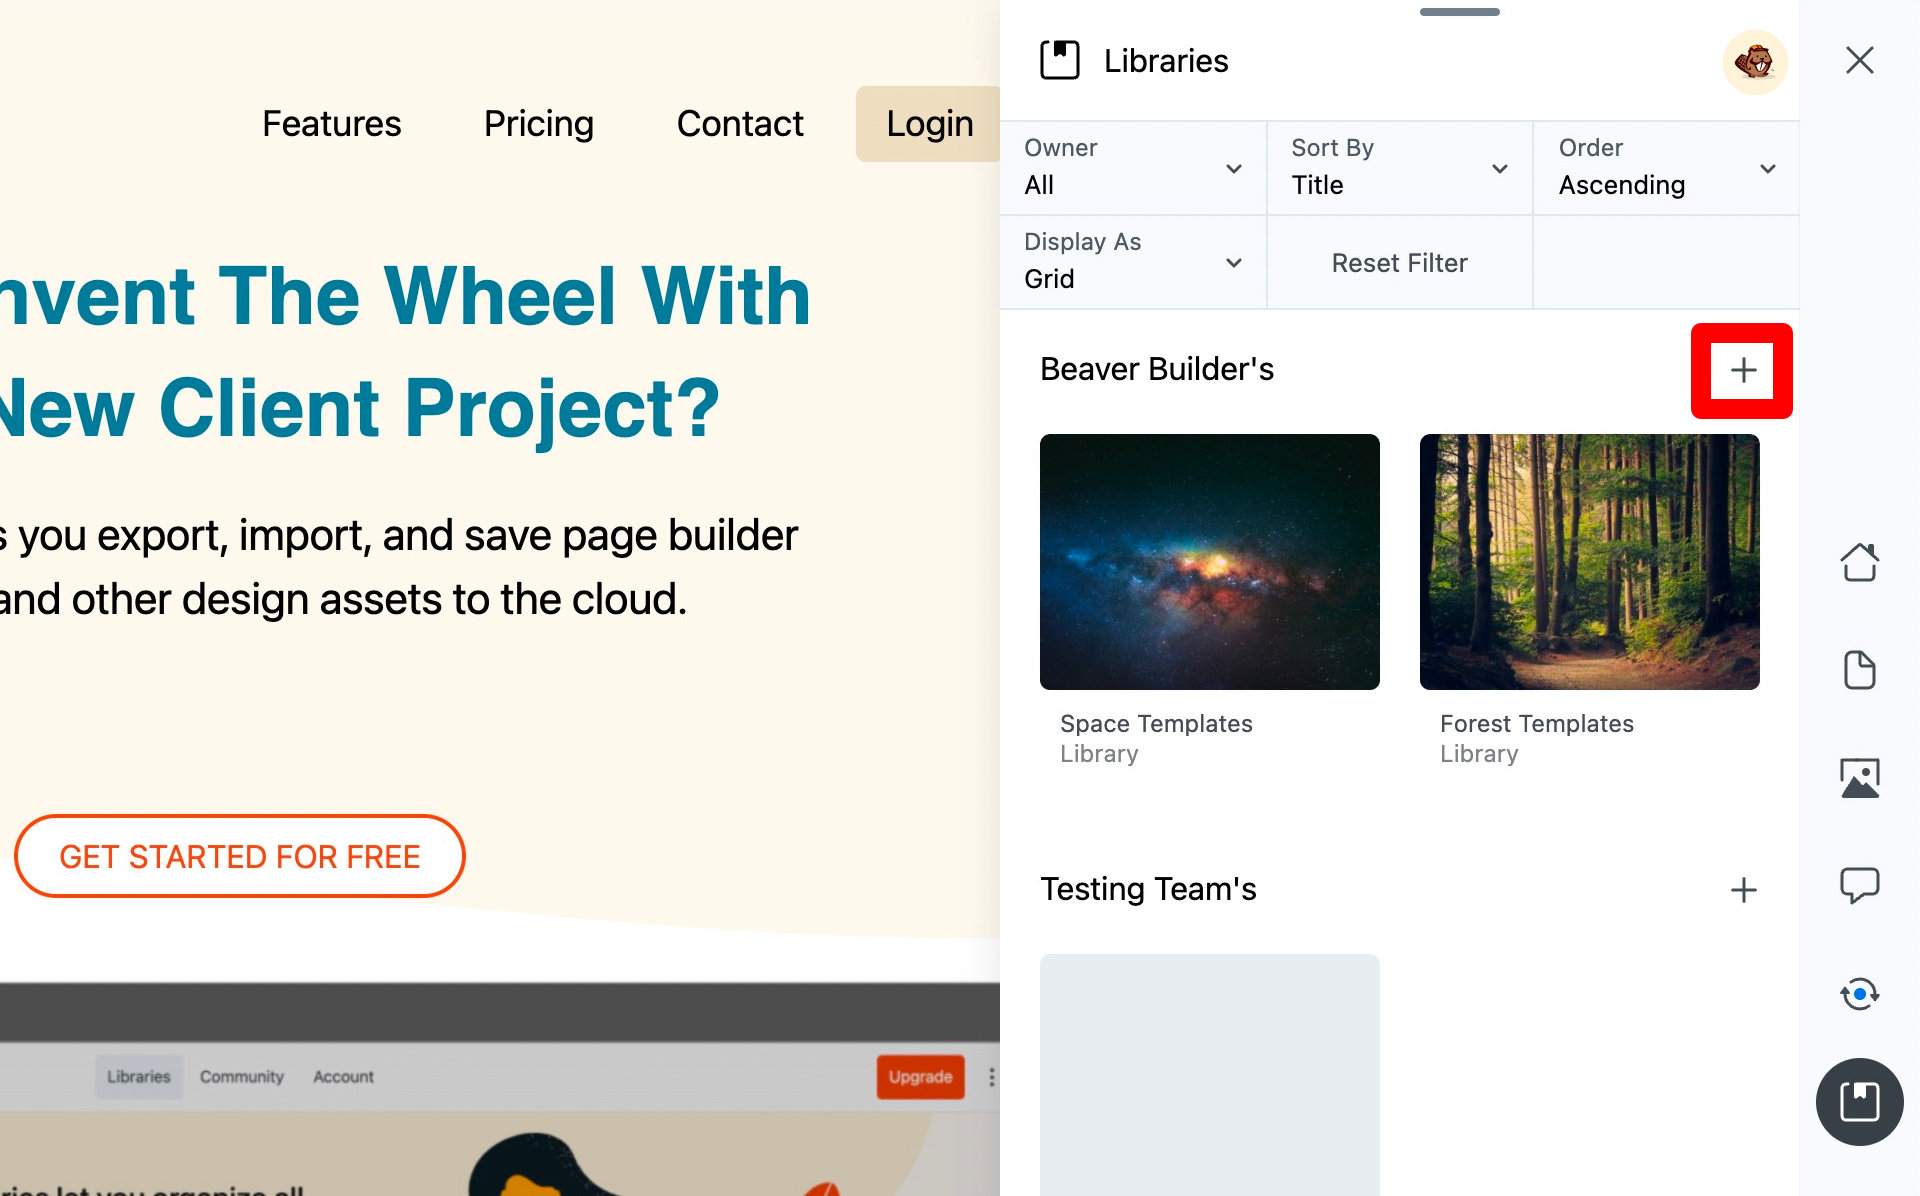
Create a Library
To create a new library from the Assistant Plugin:
- Open the Libraries App.
- Click the Plus (+) icon.
- Enter a name for your library.
- Click the Enter button or hit Enter / Return on your keyboard.
Please note that free users can create one library. Existing free accounts will retain access to any libraries they currently have, but if they have more than one, they won’t be able to create additional libraries. To access unlimited libraries, upgrading to a Personal or Team plan is required. Premium users can also make their libraries private by clicking the lock icon or adjusting the privacy settings within the library.
Add Content to libraries
The Libraries App lets you can add content, media, colors and customizer (theme) settings to your libraries.
Add Posts, Pages or Templates
- Open the Libraries App.
- Click the library you want to add content to.
- Click the Plus (+) icon.
- Enter the name of the piece of content you would like to add in the search field.
- Click the search result for the piece of content you would like to add.
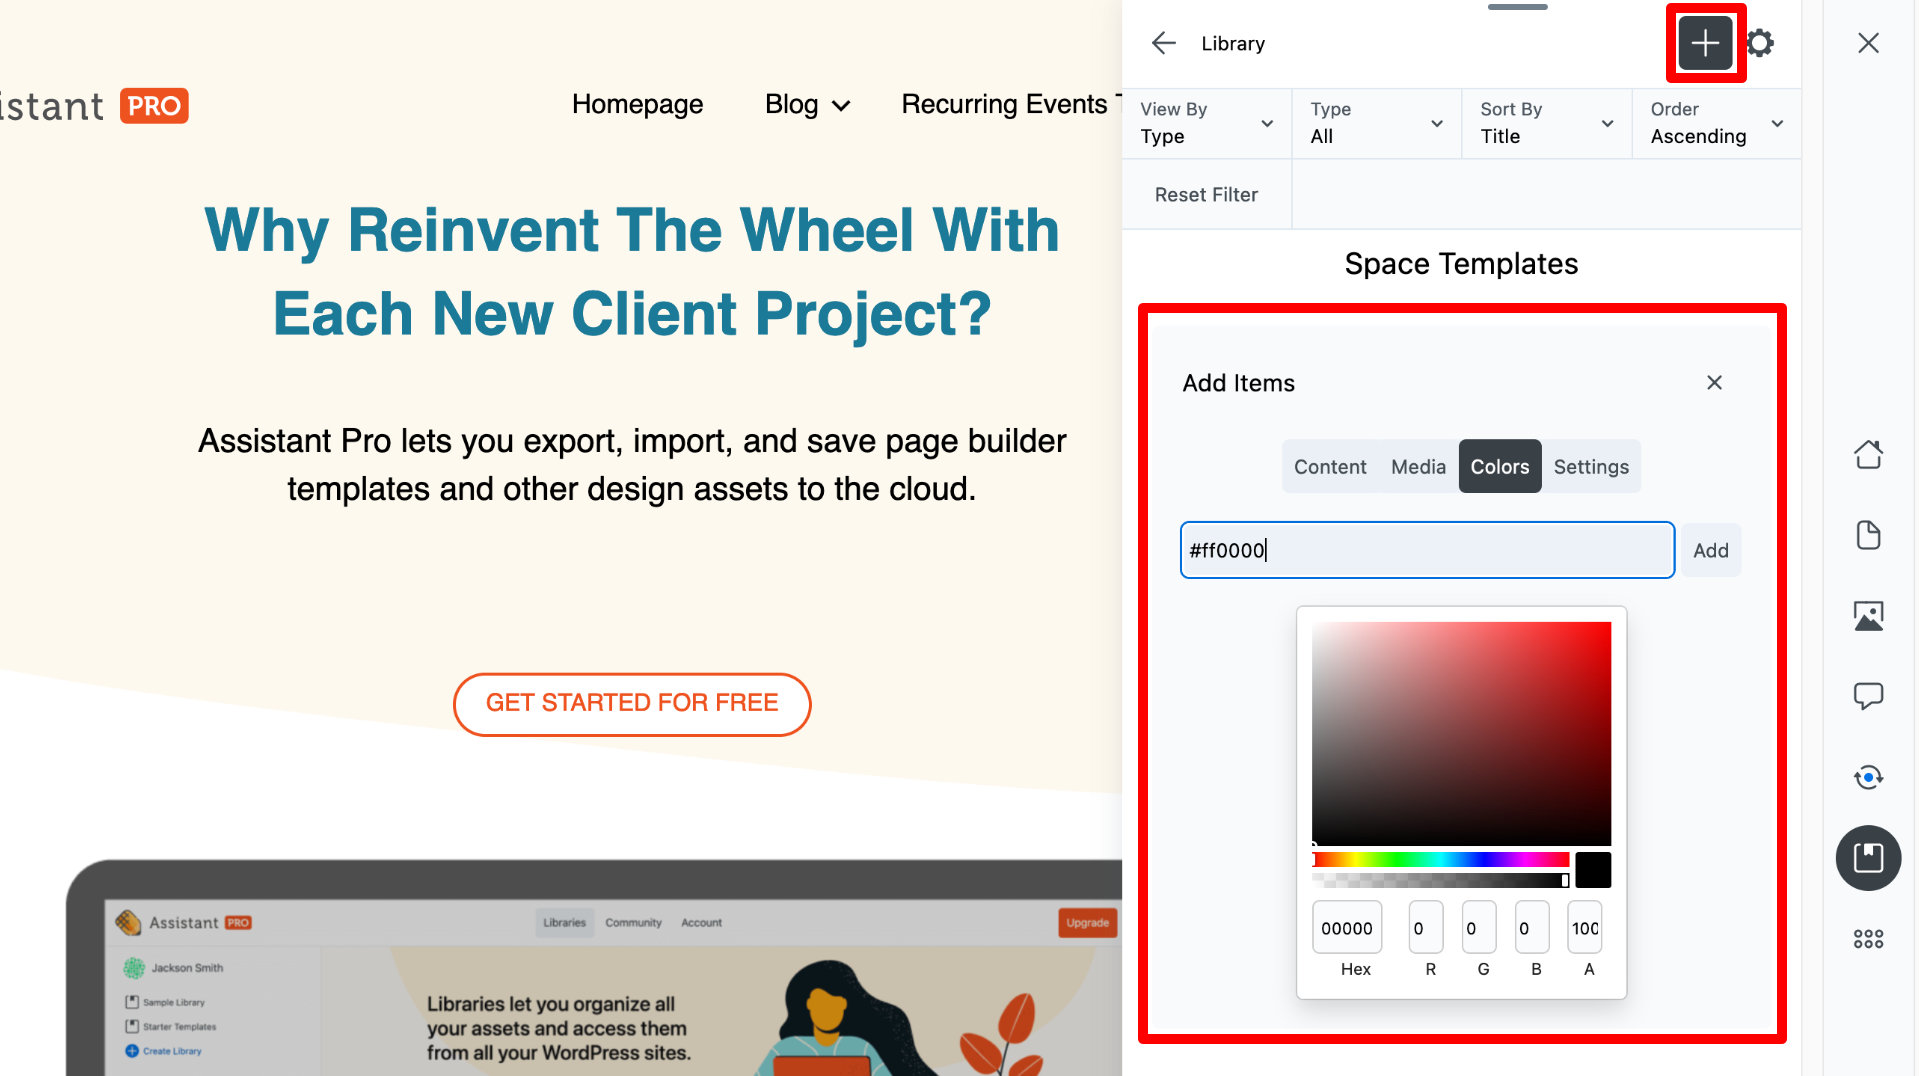
Add Colors
- Open the Libraries App.
- Navigate to the library you want to add color(s) to.
- Click the Plus (+) icon and select Colors.
- Select your color from the color picker or enter numeric values to select a color.
- Name your color (by default the name will be the color’s hex code).
Add Code Snippets
- Open the Libraries App.
- Navigate to the library you want to add the code snippet to.
- Click the Plus (+) icon.
- Select Code.
- Type or paste your code snippet.
- Click Add.
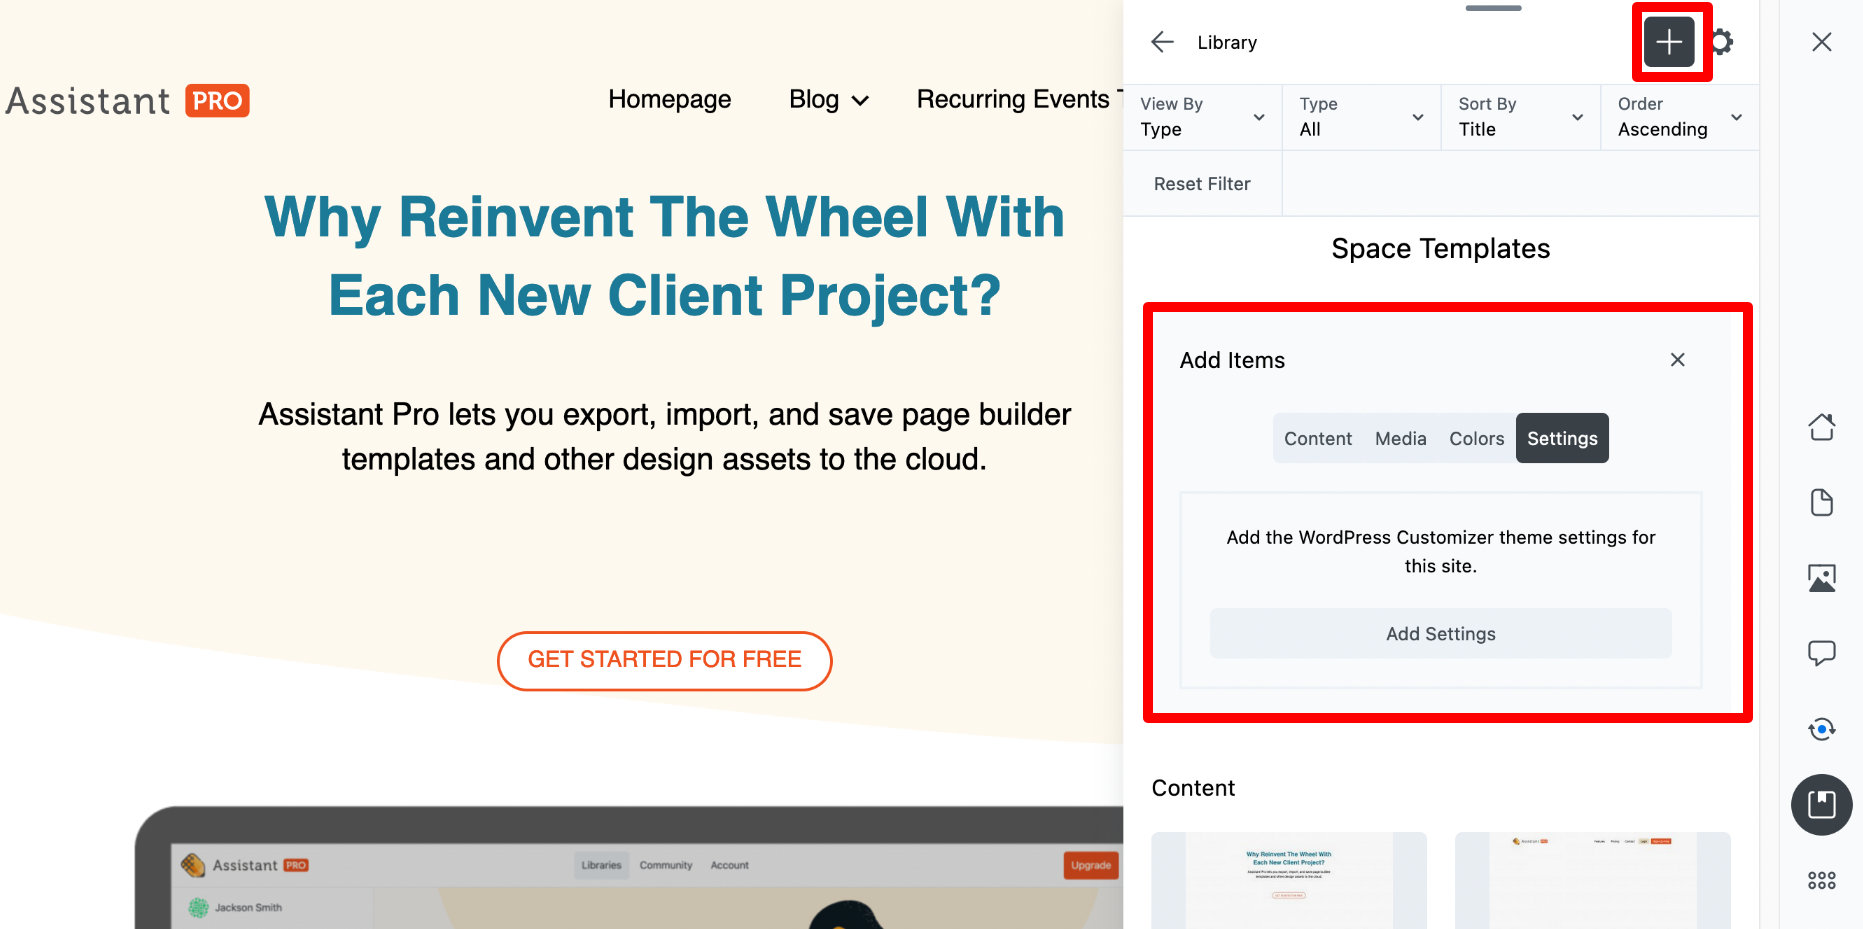
Add Theme Settings
This procedure saves your site’s customizer settings.
- Open the Libraries App.
- Navigate to the library you want to add the theme settings to.
- Click the Plus (+) icon.
- Select Settings.
- Click Add Settings.
Edit a Library
To edit a library from the Assistant Plugin:
- Open the Libraries App.
- Navigate to the library you want to edit.
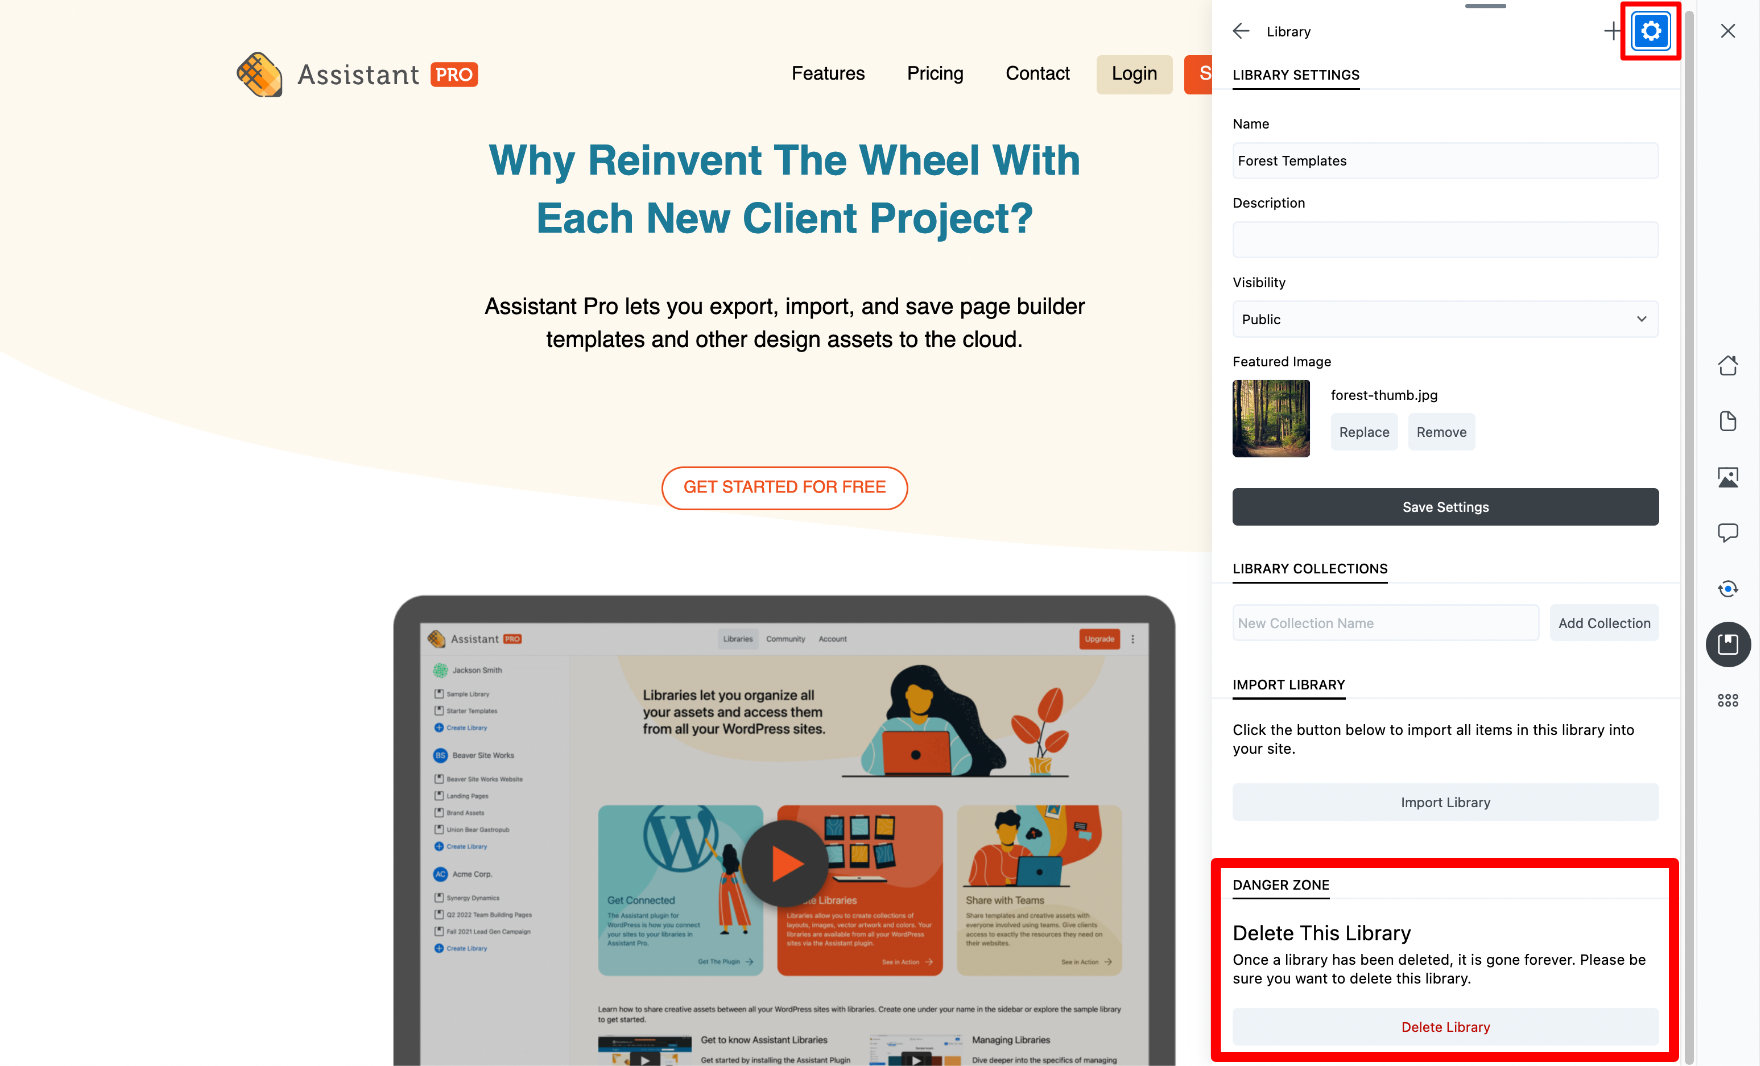
- Click the Settings button (cog icon).
From here, you can perform the following actions:
- Name - Edit the library name.
- Description - Give the library a description.
- Visibility - Set the visibility of the library, chose between Public and Private.
- Featured Image - You can assign an image to the library which will be used for the Assistant's user interface (UI).
- Library Collections
- Import Library
- Delete Library
Delete a Library
To delete a library from the Libraries App:
- Open the Libraries App.
- Select the library you want to delete.
- Click the Settings icon.
- Scroll down to the Danger Zone section.
- Click the Delete Library button in the Delete this library section.
- Confirm the deletion.
Import Content
You can import content and creative asset from a library to a website with the Assistant plugin.
Import Content
First, in the Libraries app, navigate to the library that has the content you want to import and click on it.
Import a single library item
Navigate to Content section and select the piece of content you’d like to import to your site.
Scroll down and click the Import action and select one of the following choices:
- Create New
Imports the library item and creates a new page or post in the WordPress Admin Dashboard. - Replace current Page/Post
The library item is imported on the current page or post.
cautionThis action replaces all content in the posts.
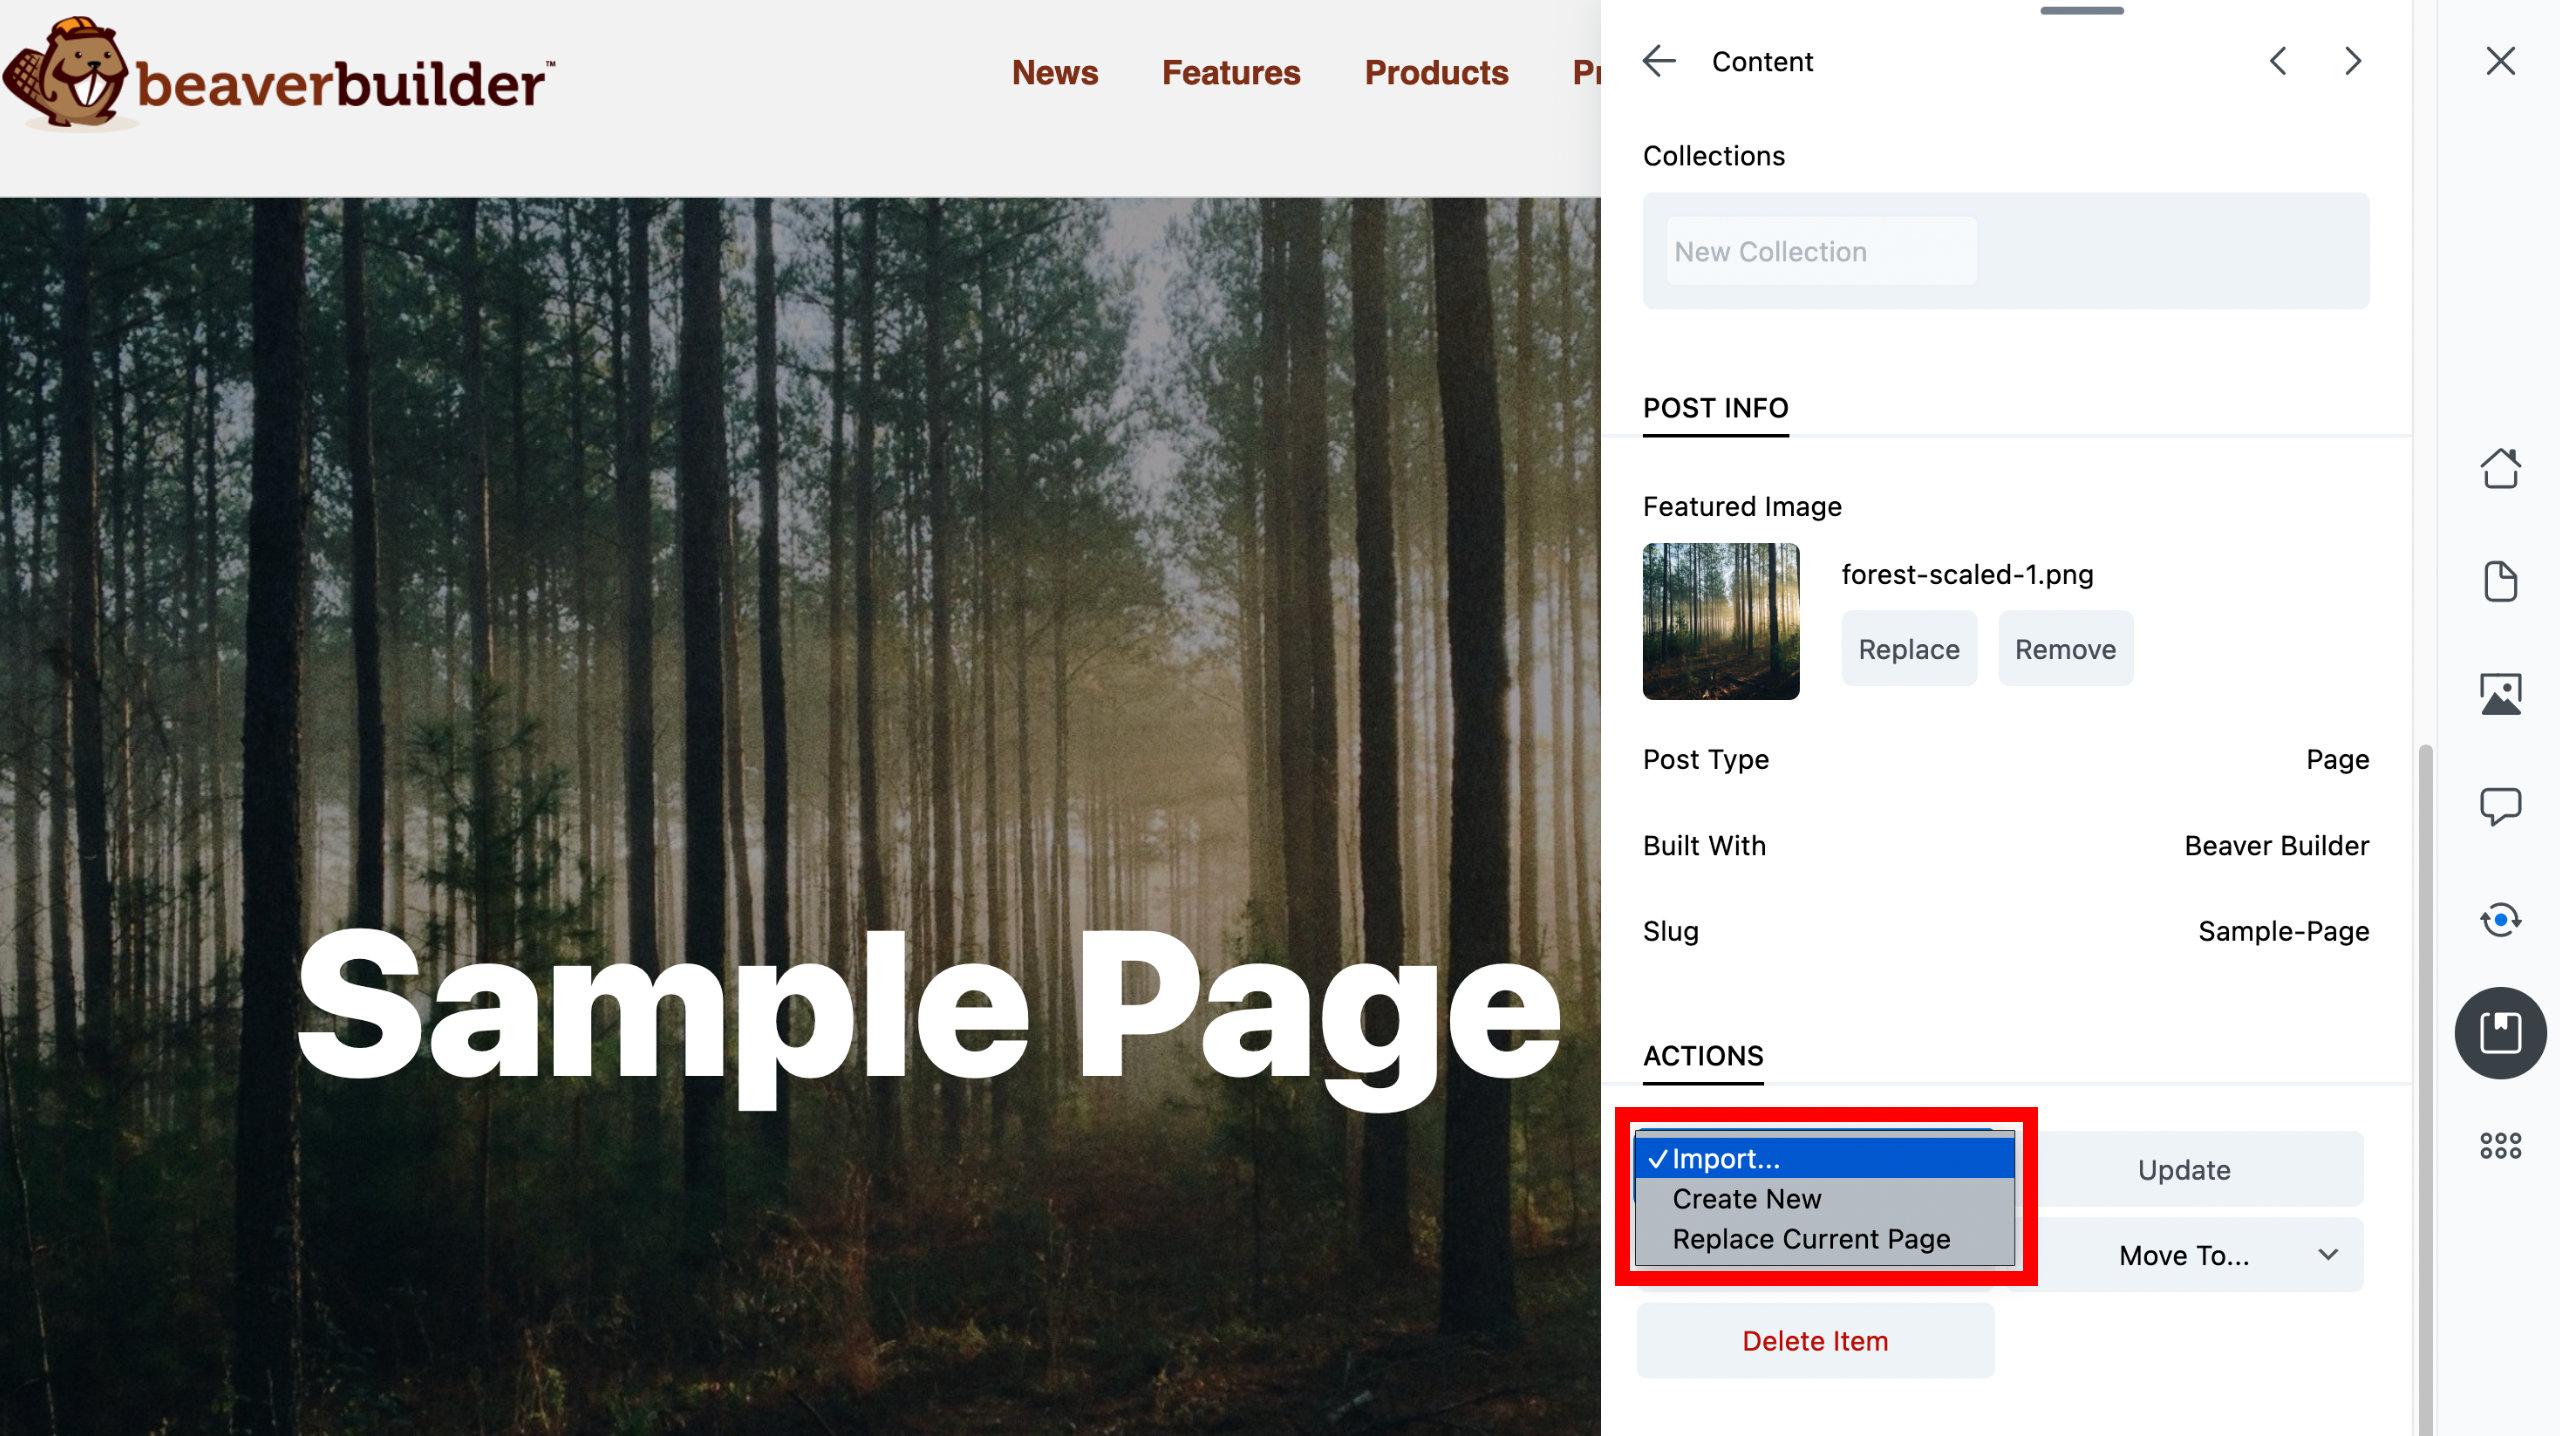
- Create New
Bulk Import of library items
- In the library toolbar, click on the Select button to enable selection mode.
- Navigate to the Content section of the library and select the library items you'd like to import to your site.
- A blue section will then appear underneath the library toolbar. As you select items, it keeps track of the number of items you have selected.
- Once you've selected all library items, click the Import button.
- Wait for import to complete before navigating away from the page.
Import Images
- In the Libraries app, navigate to the Images section and select the image you’d like to import to your site.
- In the Actions section, click Import.
The image will now be available in your WordPress Media Browser and Assistant Media app.

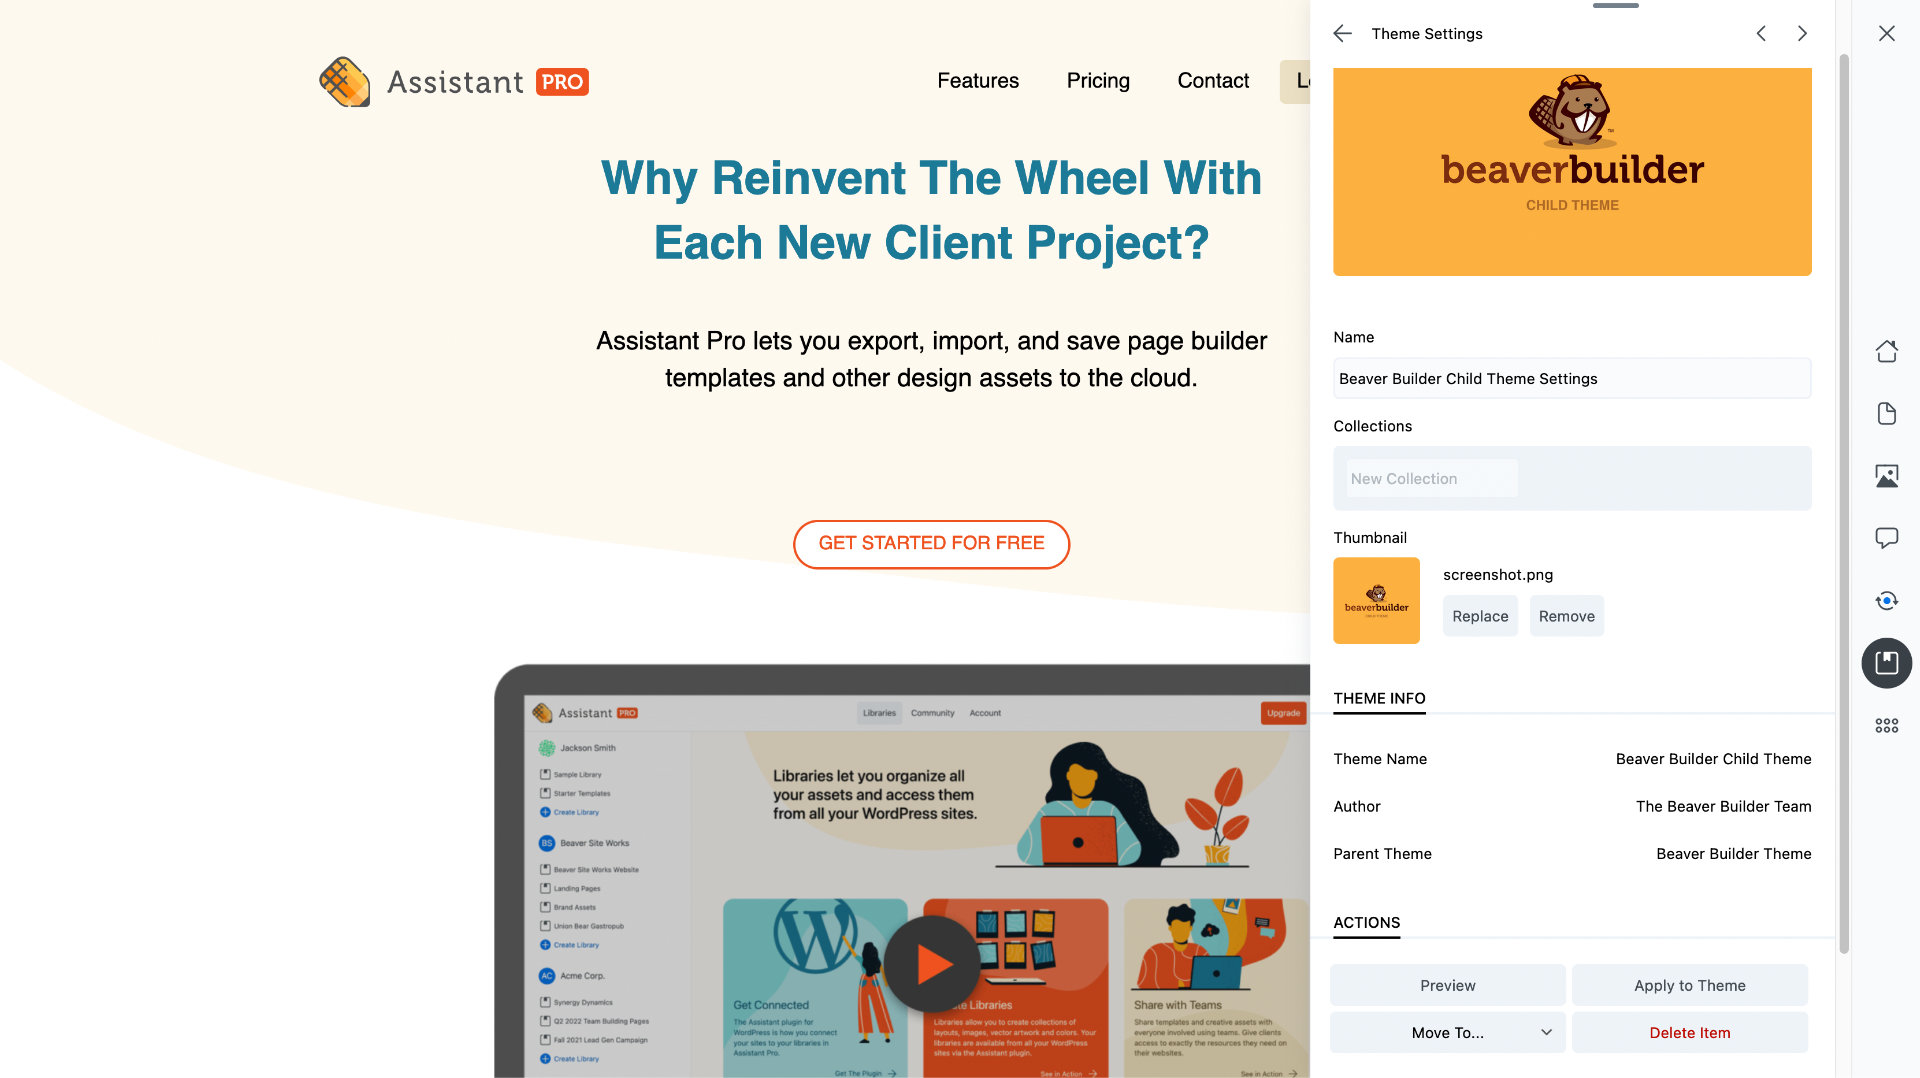
Import Theme Settings
- Open the Libraries app.
- Navigate to the Theme Settings section and select the theme settings item you’d like to import to your site.
- In the Actions section, click either Preview to preview the settings, or Apply to Theme to replace your current settings.
The Apply to Theme setting overwrites any current theme settings, so be sure to back them up before using.
Import an entire library to a site
You can import an entire Assistant Pro library to a website. Importing a library in one step imports all of the creative assets in your library except colors.
To import an entire library:
- In the Libraries app, select the library you’d like to import to your site.
- Click the gear icon to open the library settings.
- In the Import Library section, click the Import Library button.
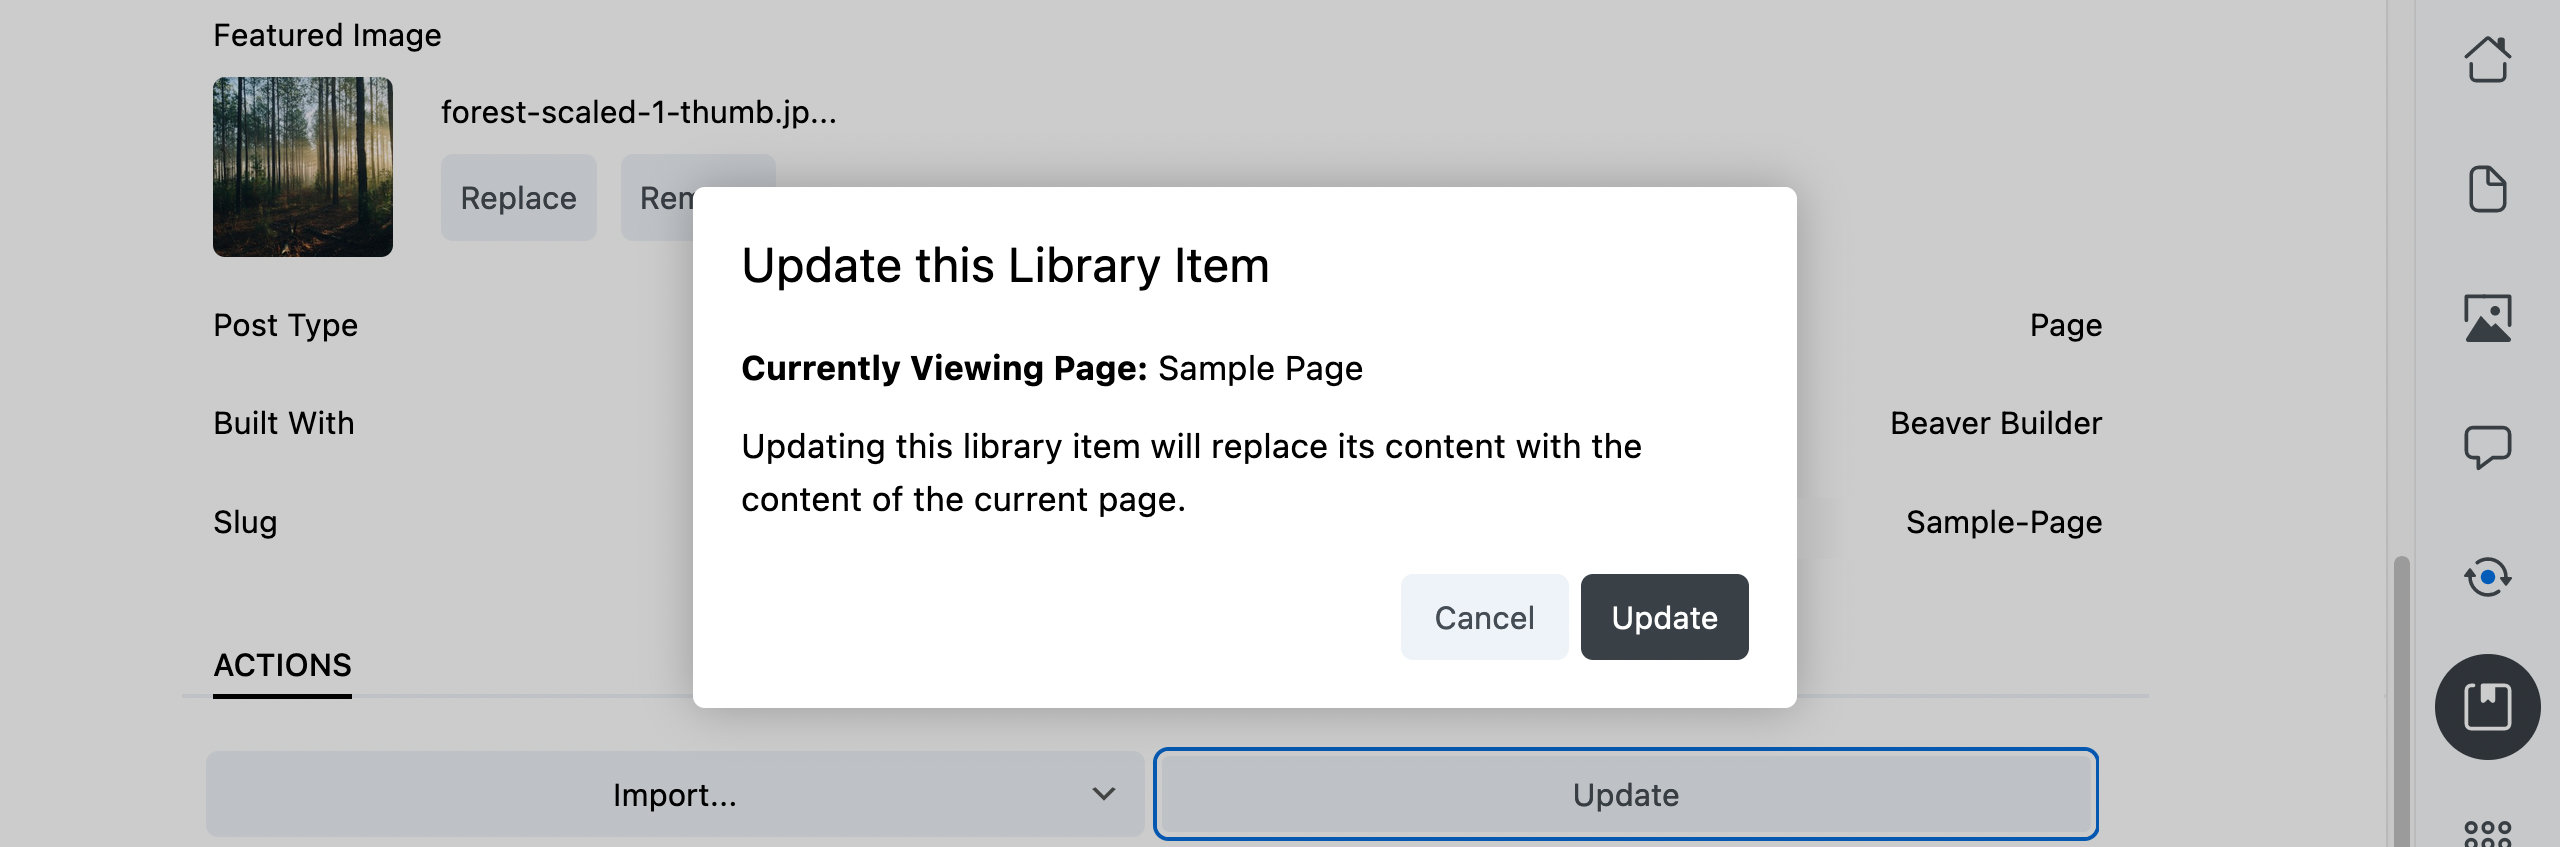
Update
The Update action allows you to update the library item with the content from the current page or post.
Assistant Pro does not store revisions in the cloud, so this action cannot be reversed.
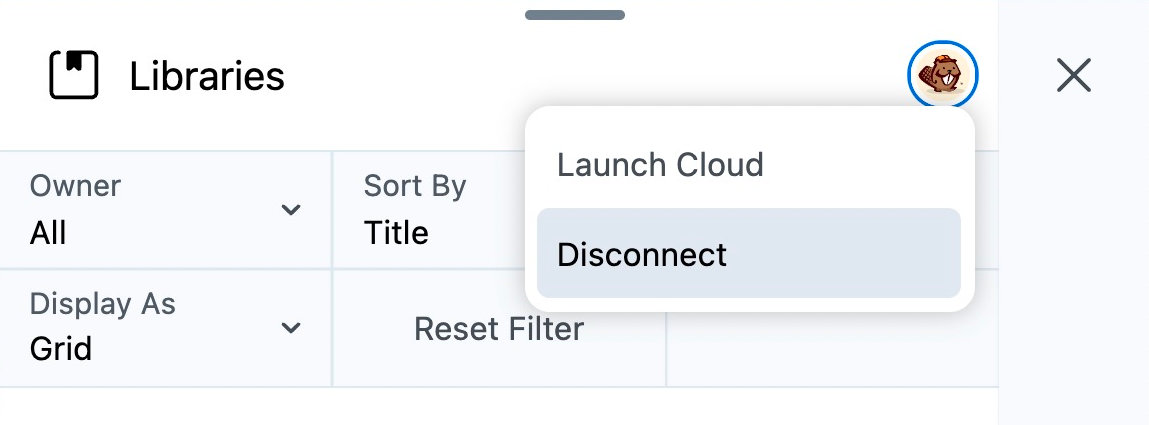
Launch Assistant Pro Cloud
You can quickly launch Assistant Pro Cloud in a browser from within Assistant plugin's Libraries App.
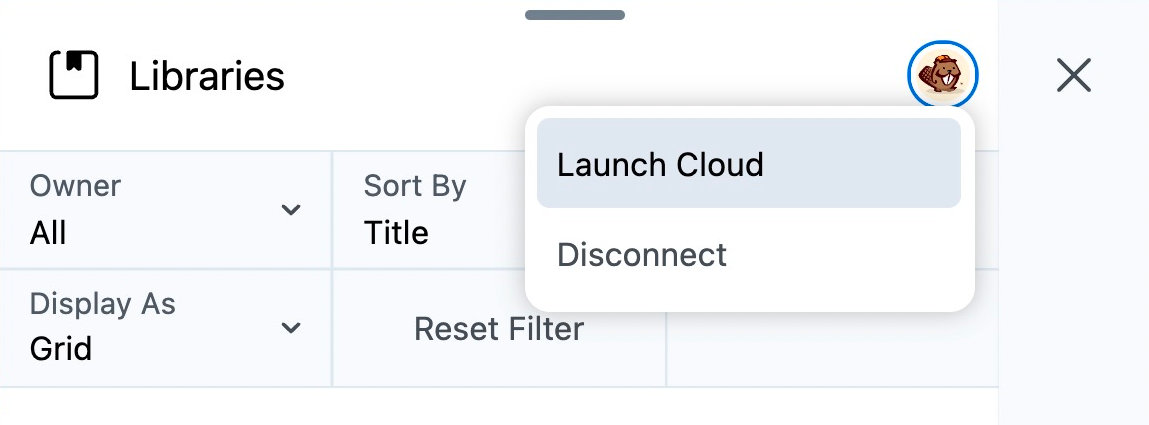
To launch Assistant Pro Cloud from the Libraries App:
- Open the Libraries App.
- Click your avatar in the upper right corner.
- Select Launch Cloud.
Using the Launch Cloud option is only possible after you have connected the Assistant plugin.
Disconnect from Assistant Pro Cloud
The Assistant Pro Cloud can be disconnected from within the Libraries App. To disconnect your WordPress site from an Assistant Pro Cloud account:
- Open the Libraries App
- Click your avatar to deploy a dropdown menu
- Select Disconnect
If you are disconnected from the Assistant Pro cloud, the Library App will be unable to access libraries, and you will need to reconnect for libraries to display.